Hi Everyone! Thank you so much to those of you who took the time to vote and provided some really original ideas. The winner, with over 40% of the vote was "Mel's Healthy Kitchen". So, from now on, in order to check new postings please go to http://www.melshealthykitchen.com/. I am so sorry for any inconvenience, but it is my intention to not have to go through this again!
When you visit the new blog, you will also see a new recipe, for a really terrific smoothie that the kids and I came up with on July 4th. Add a little rum and it would be a knockout adult treat too! Thank you so much for your support. I look forward to keeping you "posted" on the latest and greatest and hearing your comments.
Please share the new website with anyone else you think may be interested.
In Good Health,
Mel
(formerly Your Nutritionista)
Tuesday, July 13, 2010
Wednesday, July 7, 2010
Chocolate Cake with Minty Chocolate Frosting!

Have fun! I encourage you to try them on one of your favorite recipes, or one that you've been thinking about trying. Of course you can always just make this one and be blown away by just how good "healthier" can taste!
Chocolate Cake with Chocolate Mint Frosting
(adapted from tryveg.com’s free vegetarian starter guide)
CAKE:
2 ¼ cups whole wheat pastry flour
4 ½ Tablespoons cocoa powder
1 ½ cups raw sugar (or evaporated cane juice)
1 ½ teaspoons baking soda
½ cup unsweetened applesauce
1 ½ Tablespoons white vinegar
1 ½ teaspoons vanilla extract
1 ½ cups cold water
1. Preheat oven to 350 degrees, spray a 9x13 inch pan with cooking spray.
2. Combine dry ingredients in a large mixing bowl and mix with a wire whisk
3. Add wet ingredients to the dry and stir quickly, until batter is smooth.
4. Pour smooth batter into the prepared pan. Bake for 20-30 min. (or until you can insert a toothpick and it comes out clean). Cool completely before icing. Easy Peasy!
ICING:
1 12-oz. bag of dairy-free chocolate chips
¼ cup milk substitute (rice milk, or soy milk)
1 Tablespoon (yes, Tablespoon) of peppermint extract
1. Melt chocolate chips in a small saucepan over very low heat. Add milk substitute and peppermint extract and stir continuously. Add a little more rice milk or peppermint if necessary to reach desired flavor and consistency.
2. Cool completely before frosting the cake. This cake is wonderful on it's own, but if you want to make it a little more decadent, add a small scoop of non-dairy "ice cream" (ex: Soy Delicious Ice Cream, or Coconut Bliss). Enjoy!
Tuesday, July 6, 2010
Rock the Vote!
Thank you all for all of your contibutitions and creative ideas. I know I said I'd narrow it down to 3-5, but I could only whittle it down to 6. This is where your input, again, is much appreciated. Please try to keep your votes to only your top 1 or 2 favorites. Your input will weigh very heavily on the final decision.
Thanks again for your help. Polls will close in 1 week. :)
Watch for a new recipe in the next day or two! This one's for you, chocolate lovers!
Thanks again for your help. Polls will close in 1 week. :)
Watch for a new recipe in the next day or two! This one's for you, chocolate lovers!
Saturday, July 3, 2010
Help! Our Blog is Having an Identity Crisis!
It seems as though there are quite a few "nutritionistas" out there. So many, in fact, that it is hard to get a URL (website address) and the search results are numerous. So it looks like we're going to have to start looking at changing the name of our little blog before it gets much bigger.
I've always been one for brainstorming, so your suggestions are critical. If you have any clever, unique ideas, please email them to me at meltrinidad@gmail.com. The top 3 to 5 results will be posted for blog readers to vote on.
Thank you so much for your continued support and creative input!
Next week look for a new post with a recipe for Chocolate Cake with Chocolate Mint Frosting! Yummy!
Thursday, July 1, 2010
Baking Substitutions for Healthier Treats!

The 2 reasons why I now bake.
A Declaration of Baking Independence!
For years I've said "I don't bake, I cook." However, I am now finally starting to admit to myself that, yes, I do in fact bake...and it's fun!
The perceived constraint of not being able to deviate from a recipe seemed too restrictive. I like having the flexibility to play around with amounts and ingredients, which cooking lends itself to very well. My guess is that many of you can relate.
Now, as I begin venturing out of my "comfort zone" with regard to baking, I'm starting to learn that yes, one can make substitutions to create delicious and nutritious baked goods. You just have to be careful of what you change, and just how much.
Below you will find several substitutions that I have learned from a wide variety of sources, and through trial and error (Better my errors than yours, right?!). Now you can have a treat without the added fat and calories of oil. You won't miss the cholesterol and saturated fat from butter and eggs. Use whole grain flour in place of all-purpose white flour for added fiber and nutrients our bodies need to function properly.
This is where YOUR comments are so vital. I know there are many of you out there who have a favorite healthier subsititute that you like to use. By all means, please share it!
SUBSTITUTIONS
WHITE ALL-PURPOSE FLOUR
Whole wheat pastry flour (for items leavened with baking powder or baking soda, not yeast)
White whole wheat flour (good for yeast breads)
The following flours are also fun to use too.
Garbanzo Flour (aka Gram flour) – Gluten free, high in protein and fiber. Used in Indian and middle eastern food. Great for flatbreads and thickening soups and sauces.
Spelt flour – an ancient cousin to modern wheat, spelt has a nutty flavor and is high in fiber. Great for breads and baking.
Barley flour – easily digested, wheat-free, low gluten content.
BUTTER
Non-hydrogenated, trans-fat free margarine Earth Balance is now available in sticks for baking too!
OIL
Applesauce
Mashed ripe bananas
Prune puree – Baby food prunes work great!
EGGS
Flaxseed meal (2 Tablespoons + 1/4 cup water per egg)
Egg Replacer (1 Tablespoon + 3 Tablespoons water per egg) I use Bob’s Red Mill brand
CREAM
Cashew cream - Soak raw cashews overnight in water, drain and cover with fresh water and blend on high power until smooth.
MILK
Any of the following "milks" will do a good job at replacing cow's milk:
soy, almond, hemp, rice, hazelnut, or oat milk
GRANULATED WHITE SUGAR
Pure Maple Syrup
Agave Nectar
Brown rice syrup
Raw cane sugar (aka Turbinado sugar)
Organic sugar (aka Evaporated cane juice)
NOTE: if you use a sugar product, make sure that it says it comes from cane sugar. Otherwise it may come from a genetically engineered source. Sugar beets are now commonly grown from genetically engineered seed.
So get bakin' in the kitchen and try one or more of these substitutions, and share your creations! You'll feel less guilt, your body will thank you, and the smiles you generate will make your efforts worth while!
Have a Happy 4th!
In good health,
Your Nutritionista
Thursday, June 24, 2010
The Quick and Easy Green Panini

In the spirit of Food Network celeb, Guy Fieri… “One bite of this sammy and you’ll be takin’ the train to flavor town!”
Okay, if you can make a grilled cheese sandwich, you can make a Panini! And, you don’t need some fancy-pants Panini grill to do it. Although if you have one, they are nice and make those very pretty grill marks on the bread.
Me, I’m cheap, and I’m old school. Though I must admit I have been known to be a sucker for kitchen gadgets, for my Paninis I just use a cast iron griddle (smooth) or grill pan (creates the traditional grill marks) and something heavy to smoosh the sammy (wrap a brick in foil and you’re good to go)! My Lodge griddle came with a “bacon press” so I just use that. The bacon press is just a cast iron plate with a handle.
Thank goodness for food ruts, since that’s how I come up with some of my favorite recipes and this one is no exception. Last week I was in a total lunch rut, and wanted to do something easy but different, so I thought….panini! This is what I came up with and the results were incredible. The flavor in this thing (largely due to the fresh basil leaves) lingers and makes you want to savor the flavor before taking another bite. The biggest bonus…the whole family loved them, in fact, they inhaled them! AND they were full of greens and wonderful healthy veggies. BO-NUS!!!!!!
You’ll notice that I do use a little trans-fat free non-dairy margarine on the outside of the Panini’s to create a more browned and crispy exterior. However, you can just as easily skip this part and not add the extra fat, especially if you are using a non-stick cooking surface.
Like in the hummus quesadillas, the hummus here becomes oozy and may start to drip a little over the sides of your Panini. Be careful not to pile the fillings too high though. Paninis are supposed to be thin, and if you add too much stuff, it will all ooze out onto your pan. So don’t go too crazy, just keep it simple.
Again, this is another recipe that I encourage you to play around with. If you aren’t crazy about basil, try a different fresh herb that you DO like, or add fresh spinach. Make it your own, and make it healthy!
Panini Verde
Makes 4 Paninis
¼ cup water
4-6 oz. sliced mushrooms
½-1 Tablespoon tamari (can use soy sauce or Bragg’s Liquid Amino Acids instead)
2-4 cups kale, chopped
Earth Balance, or other trans-fat free, non-dairy margarine
8 slices sprouted grain bread (has nuttier texture and nutritionally superior to whole wheat or white bread)
Hummus (see hummus quesadilla post for homemade, oil-free hummus recipe)
1 medium to large tomato, sliced
2 Tablespoons chives, chopped (try using a clean scissors, instead of a knife)
8 large fresh basil leaves
1. Place ¼ cup water in a medium-sized pan, over medium heat
2. Add mushrooms and cook, stirring occasionally, 2-3 minutes. Stir in tamari. Add kale and cook, stirring occasionally, until wilted. Turn off heat and set aside.
3. Heat a large grill pan or griddle over medium heat.
4. Spread a very thin layer of Earth Balance on one side of the bread slices.
5. Flip bread over and spread with a thick layer of hummus.
6. On 4 of the slices, top hummus with the mushroom mixture, tomato slices, chives and basil.
7. Place the remaining halves on top of the mushroom topped ones. The Earth Balance should be on the outside of the sandwiches.
8. Place 2 sandwiches (or however many will fit, without crowding) on the griddle and top with a heavy pan, brick, bacon press, whatever. Once the bottom of the sammy is brown, turn over to brown the other side and press again.
9. Once both sides are browned, remove from the pan, and cook the remaining sandwiches. Once they are done, cut on the diagonal and serve. Yum-a-licious!!!
Friday, June 18, 2010
Eat Them Greens! Green Wrap - 2 ways

Many people say "I can't fit enough veggies into my diet." I completely understand. It was difficult for me too, until I started cutting back on dairy and meat. Then it became much easier. Doing this kind of trade off will also decrease your intake of cholesterol and saturated fat, while significantly increasing your intake of the nutrients your body needs to run optimally. Think of it as fueling your tank with ultra-premium fuel, instead of regular.
One really easy way to bump up your intake of greens is to wrap your meal in a beautiful, huge collard green leaf. They can be the size of a large burrito-size tortilla; perfect for wrapping up lunch as an easy, meal-on-the-go!
The great thing is that these collard wraps are so versatile! You can fill your wrap with just about anything from salads or roasted veggies to left over stir-fry or take-out Thai food. I always try to cook up a large batch of brown rice to have on hand during the week. It really makes quick meals super-easy! Its a great whole-grain, gluten-free filler. Have fun! You're only limited by your own imagination!
Recipes for Green Wraps - here are a couple different variations
One bunch collards, rinsed, stems removed
Blanch whole collard leaves in a large pot of boiling water for 2 minutes, then run under cool water, or place in a bowl with cold water to stop the cooking process. This makes the leaves a beautiful bright green, and more pliable for burrito wrapping.
1 bunch beets, tops removed
1 large russet potato
2 carrots
2 leeks cut in half lengthwise, then sliced crosswise and rinsed in a colander OR 1 large onion
1-2 Tablespoons olive oil
salt and pepper to taste
2 cups brown rice, uncooked, rinsed
4 cups water
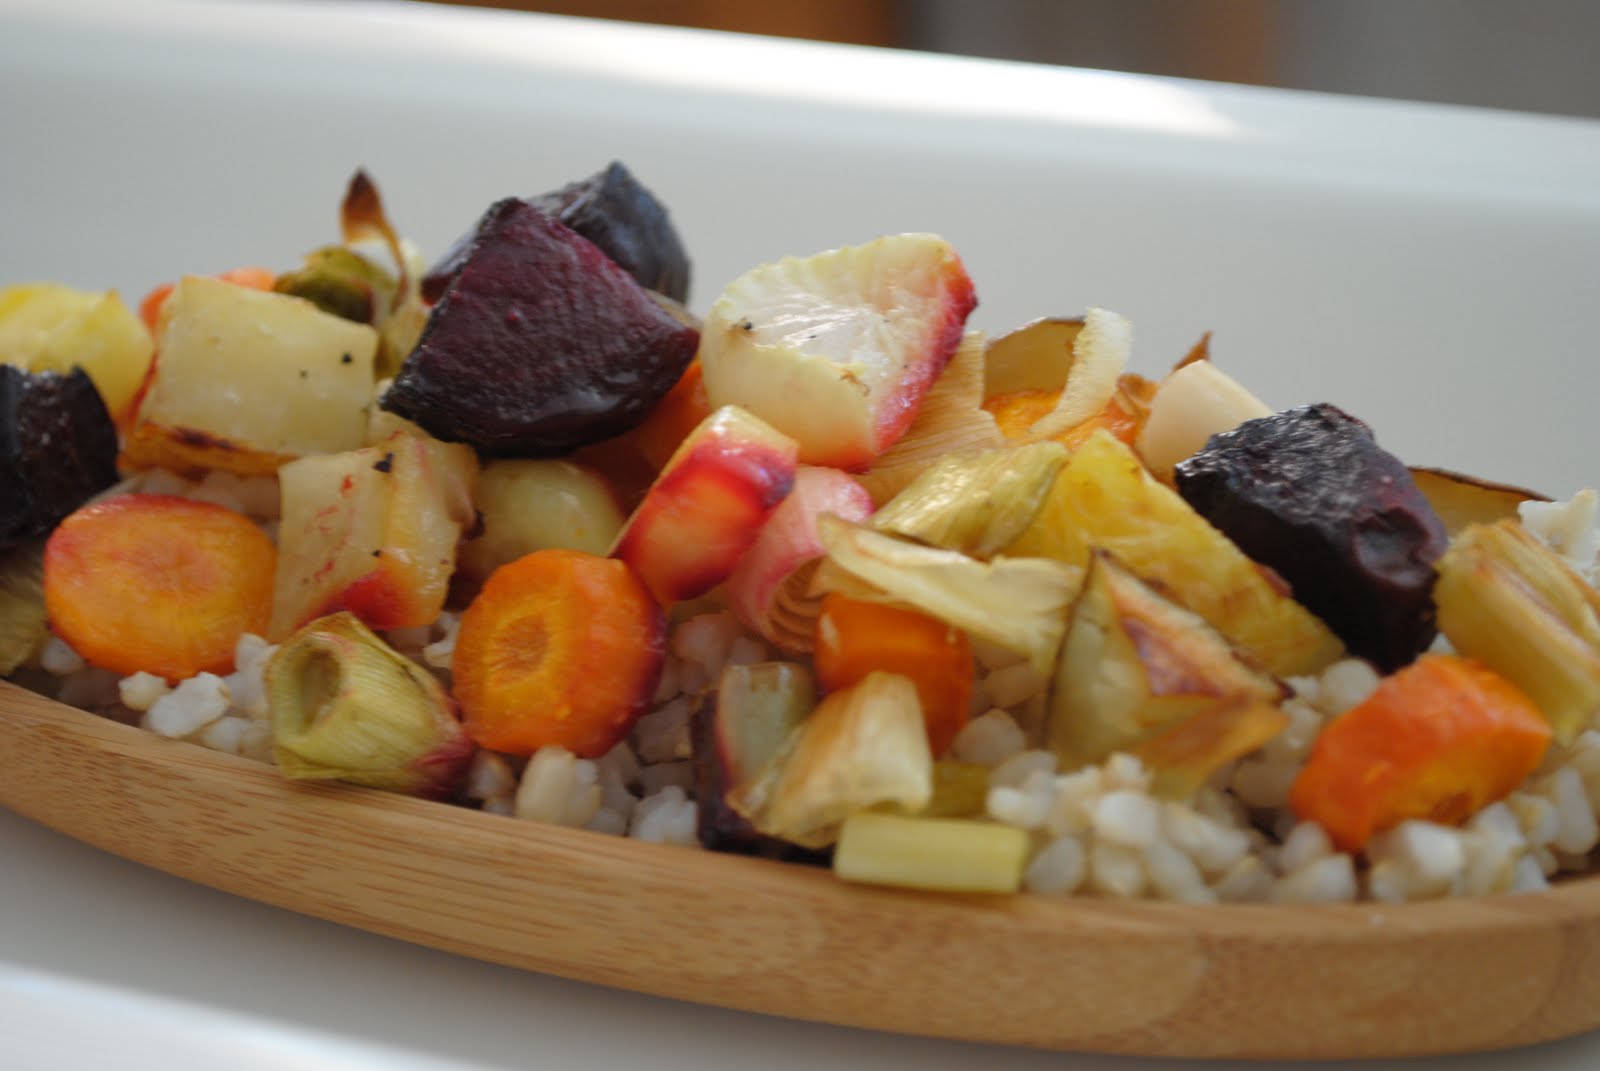
Preheat oven to 400 degrees. Rinse and scrub veggies, then cut into 1 to 2 inch pieces (the smaller they are, the quicker they'll cook). Throw all the veggies in a bowl, season with salt and pepper and a drizzle of olive oil. Toss to combine. Spread out out over a foil-lined baking sheet (makes for much easier clean up), and roast for 30-45 minutes or until browned and cooked through.
While the veggies are roasting, bring 4 cups of water and 2 cups of brown rice to a boil in medium saucepan, then simmer on low for 40-45 minutes. Easy Peasy!
Once cooled, place some roasted veggies and rice in the center of the blanched collard leaf and wrap it up, burrito style. Fold the sides in first, then roll it up! Roasted veggies and rice make great leftovers too!
Tropical coconut rice and veggie wraps
1/2 small Napa cabbage (Romaine or Boston/Bibb lettuce would work too), thinly sliced
2 large handfuls sugar snap peas
1 large handful bean sprouts
2 teaspoons sesame seeds, to taste
1-2 inch piece of fresh ginger (depending on how much you like ginger), minced (peel the skin off with the edge of a spoon!)
2 green onions (aka scallions), sliced
2 tablespoons rice wine vinegar
salt and pepper to taste
2 cups white rice, rinsed
1 can light coconut milk
Combine napa cabbage through green onions in a large bowl. Drizzle with rice wine vinegar, and salt and pepper to taste. Combine rice and coconut milk either in a rice cooker or small saucepan. Be sure to give the can of coconut milk a good shake before opening, since it may separate a bit in the can. If cooking in a saucepan, bring the coconut milk and rice to a boil, then simmer, covered for 20 minutes.
Lay collard leaf out on a flat surface. Place some of the snow pea salad and rice in the center of the blanched collard leaf, and wrap it up, burrito style. Fold sides in first, then roll it up! Enjoy!!
Tuesday, June 8, 2010
Summertime Berry Shortcake! Yummmmmy!

Nothing says summer like fresh berries! Not only are they sweet, juicy and delicious, they are wonderfully nutritious! For example, strawberries are high in vitamin C and also contain cancer preventing phytochemicals like anthocyanins and ellagic acid. They are also good sources of fiber, folate and potassium. Blueberries are the richest of all fruits in antioxidants which help to protect us from various cancers and other diseases like high cholesterol and diabetes, memory loss and heart disease. Blueberries are also high in fiber and vitamin C, and may also help protect against urinary tract infections, and intestinal upsets. If it were a drug, it would be flying off the shelves!
Just to be clear, I am not advocating dropping your doctor prescribed medication, just suggesting that berries could be a good addition. And along with other dietary changes, may help to avoid these problems in the first place. Often times we think berries are expensive, but when you look at how much pharmaceuticals cost, it’s a bargain. And I can guarantee, prescription meds don’t taste this good!
Berries:
1-2 pints strawberries, sliced
1 cup blueberries
1 cup blackberries
(You can create any combination of berries here that you desire.)
Gently wash berries, then place in a medium bowl. Sprinkle with 2 tablespoons of sweetener (honey, agave nectar, maple syrup, etc.). Mix to combine and let sit at room temperature while making the shortcakes.
Shortcakes:
2 cups whole wheat pastry flour
2 Tablespoons raw sugar
1 Tablespoon baking powder
½ teaspoon salt
5 Tablespoons Earth Balance (trans-fat free, non-dairy margarine), cold cut into chunks
1 cup cashew cream
½ teaspoon vanilla extract
1. Preheat Oven to 400 degrees
2. Combine the 1st five ingredients in a large bowl, with a pastry blender or a fork, until crumbly. Create a well in the center of the dry mixture.
3. In a small bowl, combine the cashew cream, and vanilla extract. Pour into the well in the dry ingredients.
4. Stir to combine, but be careful not to over stir.
5. Using a ¼ -1/3 cup measuring cup (depending upon how big you want them), sprayed with cooking spray, scoop cupfuls of batter and turn out onto a parchment lined baking sheet. You may have to re-spray the cup every so often.
6. Bake for 15-20 minutes. Cool shortcakes on a wire rack.
Top with cashew whipped cream (could substitute regular whipped cream, if you eat dairy).
Whipped Cashew Cream: (You need to start this the night before!)
1. Soak 1 cup raw cashews in water overnight in the refrigerator.
2. The next day, drain the soaking water and place cashews in the blender along with ¼ cup sweetener (honey, agave nectar or maple syrup), ½ teaspoon vanilla extract, and ¼ cup water.
3. Combine in blender until smooth. Refrigerate, covered, for 2 hours (if you have the time), and stir before serving.
The assembly:
1. Once cooled, slice the shortcake in half, horizontally.
2. Place bottom half on a plate. Top with 1-2 spoonfuls of berries and some of the juices. Place other half of shortcake on top.
3. Top with a dollop of cashew cream and more berries. DIG IN!!
Wednesday, June 2, 2010
Going Local – Eating Seasonally

Sure it’s great to be able to buy whatever you want whenever you want, but there’s something about the anticipation of the first vine-ripened tomato of the season, and shucking fresh corn on the cob for a summertime family barbeque. For some reason, when you have to wait for it, it tastes better. There’s also that association we have with different foods that we eat at certain times of year. Juicy fresh ripe peaches that drip down your chin with the first bite....in December? See, to me that just seems wrong!
When we buy produce that comes from other countries, we have to consider what it goes through to get here. Often times it gets from the farm to the grocery market in remarkable time, due to modern aviation. Produce is flown in from Central and South America. The more we purchase, the more jet fuel is needed to bring these products to us. Imagine the difference in fossil fuels needed to bring a Chilean apricot to your local market, versus one that you pick up at your local farmer’s market.
Meanwhile, there are farmer’s markets popping up all over the country - year round in some areas (like California) and seasonally in other regions of the U.S. Farmers markets are a win-win for both local farmers and local residence. Patrons are able to talk directly with the farmers about their produce and get the freshest products, often picked that same day. Farmer’s are able to sell the fruits (veggies, eggs, etc.) of their labor locally and directly, without dealing with a wholesaler. And the money spent on local produce remains in the local economy.
For our family, farmer’s market is a weekly experience. My kids love sampling strawberries from the various vendors, to make sure that we buy the BEST ones. It gives them purpose, and definitely satisfies a sweet tooth! As you go regularly you get to know the families and farmers that you buy from, since most of these farms are a family affair. You can find almost anything at a farmer’s market; from your typical fruits and vegetables, to local eggs, cheese, baked goods, flowers, even crafts.
Some farmer’s markets are “certified”. This means that if it is a county “certified” farmer’s market, then all of the products sold have to have been grown or created within that county. Other’s may be state certified, meaning the products sold have to come from within the state. Either way, talk to the vendors there and ASK them where the food is grown, how it’s grown (do you use pesticides, herbicides, etc.).
Next week we’ll get more into organic and sustainable farming and the differences and similarities between them. For more information on where to find a farmer’s market in your area, here are a couple of websites to peruse:
http://www.localharvest.org/
http://www.farmersmarket.com/
So find a little time this week to find a local farmer’s market, and go check it out. You may be surprised by what you find.
Roasted Beets with Oregano

These are SO good when beets are in season. Try to use whatever beet variety looks good at your local Farmer’s market (red, orange, yellow, or striped!). Beets are a wonderfully nutritious root vegetable.
Kids tend to like beets because they are a bit sweet. I like the yellow beets because they don’t stain as badly as some of the dark red ones. When little kids eat beets, it can get a bit messy if you aren’t careful.
High in fiber, iron, folate and calcium (not to mention all of those cancer fighting phytochemicals), beets truly are a superfood. They can be stored (raw) in the refrigerator for weeks at a time. Here we are only using the root, but don’t toss those beautiful greens! Beet greens are delicious and VERY nutritious as well. Sauteed with a little garlic and red pepper flakes, beet greens are a great side dish. I usually roast the beets during the day and over the course of the day everyone picks at them so by dinner time, they are history! They can be eaten warm or cold, and SO easy to prepare.
FYI: This may sound funny, but if you eat a LOT of dark red beets in a sitting, don’t be surprised if a little later you notice that your urine is a bit pink or red. This is due to the fact that some people are unable to completely breakdown the red pigment in beets and so some of it passes through the body. So it might be worth mentioning if you have to see the doctor for a urine or stool sample within a day or two of eating them.
Okay, now here’s the recipe
1 bunch beets, rinsed, scrubbed, greens removed, and cut into 1 inch pieces
4-6 cloves of garlic, peeled and smashed
Leaves from 1 sprig (about 4” long) of fresh oregano (1-2 tsp. dried will work if fresh is unavailable)
2 Tablespoons extra virgin olive oil
2 Tablespoons balsamic vinegar
Season with salt and pepper to taste
1. Preheat oven to 400 degrees
2. Tear off 2 pieces of aluminum foil, about 2 feet long. Place one horizontally and the other vertically over the center of the first one (making a cross)
3. Put beets in the center of the foil. Add garlic, oregano, olive oil, vinegar, salt and pepper.
4. Tightly close the top piece of foil over the beets (bring ends together and roll down to meet the beets. Repeat with other piece of foil. The tighter the seams, the less likely you are to have the beet juiced run out of the foil pouch.
5. Place on a baking sheet and roast in the oven for about 40 min. or until beets are easily pierced with a fork.
Thursday, May 27, 2010
Scones…Perfected! Cherry Almond Scones with Vanilla Glaze

This recipe is for cherry almond scones, but there are so many other varieties you could try. I’d suggest using dried fruit though, just because the colors don’t bleed and they seem to hold up better in the preparation.
Other varieties could include…
• Blueberry Lemon
• Cranberry Pistachio
• Currant Pecan
• Mango Macadamia
Yields 8 scones
2 cups whole wheat pastry flour
2 Tablespoons raw sugar
1 Tablespoon baking powder
½ teaspoon salt
5 Tablespoons Earth Balance (trans-fat free, non-dairy margarine), cold cut into chunks
1 handful slivered almonds
1 handful dried cherries, chopped
1 cup cashew cream
½ teaspoon vanilla
¼ teaspoon almond extract
1. Preheat Oven to 400 degrees
2. Combine the 1st five ingredients in a large bowl, with a pastry blender or a fork, until crumbly.
3. Add cherries and almonds, stir to combine, and create a well in the center of the dry mixture.
4. In a small bowl, combine the cashew cream, vanilla and almond extracts, then pour into the well in the dry ingredients.
5. Stir to combine, but be careful not to over stir.
6. Turn dough out onto a well floured surface and form into a 12x3 inch slab. Cut crosswise into quarters. Then cut each quarter diagonally so you end up with 8 triangles.
7. Place cut scones on a parchment lined baking sheet and bake 15-20 minutes. Cool scones on a wire rack.
Vanilla Glaze (totally optional for when you want to kick it up a notch)
Start making the glaze when the scones go in the oven. This is easy-peasy!
1 cup powdered sugar
2 Tablespoons soy milk (or rice milk)
¼ teaspoon vanilla extract
½ Tablespoon (aka 1 ½ teaspoons) Earth balance, melted.
1. Dissolve sugar into soy milk and vanilla in a small microwave-safe bowl. Add Earth Balance and microwave 30 seconds. Whisk out any lumps and drizzle onto the scones.
Tip: Place a piece of parchment or wax paper under your cooling rack before the scones come out of the oven. That way you can drizzle the glaze right onto the cooling scones, without making a mess of your kitchen counter!
Going Nuts for…NUTS!
This week’s recipe includes almonds and cashew cream which is such an incredible substitution for cream in any recipes that needed that creamy mouth-feel.
Studies have shown that people who eat a handful of nuts per day are healthier and have a lower risk of disease. You must be careful though. Nuts are high in calories, and a serving of nuts is only ¼ cup. Also watch the salt and oil. Raw nuts or dry-roasted nuts are best. Try to avoid nuts that are fried in oil and salted.
Cashews are considerably lower in fat than many other nuts yet are high in minerals like magnesium (for bone and heart health, iron (for energy and healthy blood) and zinc (for improved immune function).
Almonds have many health protective effects and are very high in Vitamin E. Since they are rather high in fat, it takes longer for the body to digest and may help those who are trying to lose weight, due to the fact that they may help you feel full longer. Almonds are also a great source of calcium. Vitamin E (from food sources) can have many health benefits which may include decreased risk of cancer, cardiovascular disease, and osteoarthritis. Some studies suggest that vitamin E may even improve male fertility.
Walnuts are a terrific source of omega 3 fatty acids. In fact, ¼ cup per day of blonde (not black) walnuts can get you to the recommended amount of omega 3’s for the day. Omega 3 fatty acids have been linked to decreased inflammation, triglycerides, and blood pressure. Omega 3's have also been known to stabilize heart arrhythmias, and protect against heart attacks. Some ALA (alpha linolenic acid, the omega 3 fatty acid found in walnuts) is converted into DHA in the body, which is very important for brain development and brain health. Many studies have shown that DHA may be able to help protect against dementia. There is also some controversy over whether or not a lack of DHA may play a role in ADHD too.
Nut butters can also be a good way to get your nuts in, but be careful. You want all natural nut butters. The ingredient list should not list anything other than nuts and maybe salt. Partially hydrogenated oils are code for trans-fat, which has been to proven to be even more harmful than saturated fat.
These are only a few of the many different nuts that are out there and available. So have fun! Try a wide variety. They all have something different to offer.
Wednesday, May 19, 2010
5 Tips to Help Kids (and grown-ups) Enjoy Their Greens and Make Your Salad Prep Easier!
1. This idea is super helpful for helping your kids enjoy salad, and I owe it all to my wonderful hubby, Douglas. He's the one who came up with this and shared it with me. Often times "baby greens" are still too big for small kids to eat, and difficult for them to chew. They also often include more bitter greens like arugula. If a child just gets a big piece of greens (mild or bitter) in their mouth, they will often spit the whole thing out. Doug's simple solution: chop salad greens in smaller pieces before tossing and serving to kids. DUH! Why didn't I think of that?! This way it's easier for them to chew, and they won't get a large piece of bitter greens all at once either. Since we've done this, our 2 year old (Happy Birthday Ariela!) has been devouring her salads. It works! Try it!
2. Get them involved. We've all heard this before, but it can be difficult since it often requires patience and can get a bit more messy. But it is worth it. Even if they just shake the dressing, they are learning from you! When they participate they also are more interested in eating what "they made". Not to mention it can also give them a sense of pride and accomplishment. Don't forget to make sure they wash their hands before and after helping prep food!
3. Before you toss or recycle that old strawberry jam or olive jar, consider saving it (reduce-reuse-recycle). I've collected tons of old jars over time and they are so useful. Ones with wider openings are easier to dump dressing or marinade ingredients into before you shake them up. Glass jars with tight-fitting, lids are best. If you shop at Trader Joe's, chances are you already have some of these in your refrigerator or pantry. When they are empty, clean them out and save them as your "dressing/marinade" jars.
4. The best tools for tossing a salad are attached to your wrists...YOUR HANDS! Obviously make sure they are clean first, but gently tossing salad with your hands allows for better coverage of the dressing on all of the salad, allows the ingredients to all become better incorporated, and is more gentle and won't bruise the greens. This is also something kids would LOVE to help with!
5. Don't be afraid to get creative...add fruit to a green salad. If you notice the latest recipe is a salad with strawberries and oranges. It is sweet, colorful and delicious. We eat with our eyes, in addition to our mouths, so make sure to add colorful fruits, vegetables, beans, whole grains, nuts and/or seeds. The greater the variety of colors in your salad, the more nutrients you are consuming. Eat the rainbow, as they say!
The Most Perfectly Delicious Salad You'll Ever Eat!
The Ventura County Salad
(aka The Most Perfectly Delicious Salad You’ll Ever Eat!)
As many of you know, we are very blessed to live in an incredibly agriculturally rich area! You can’t go very far around here before you run into a roadside farm stand, and hardly a day goes by when there is not a Farmer’s Market taking place somewhere nearby. Ventura County oranges, avocados and strawberries are some of the best in the world. They are harvested and sold to buyers all over the country. The best part is that all of this incredible stuff is in season right now! It was this fresh, local produce that inspired this mouth-watering, tastebud-awakening creation, which is dedicated to all the hardworking farmers across this land who provide us with this delectable bounty! As my kids say in the car as we drive past the farms, "Thank you farmworkers!"
Serves 2-4
1 head butter lettuce or 1 package mixed baby greens
2 oranges, rind cut off, fruit cut into small pieces
½ large avocado, cut into small chunks
10-12 medium-size strawberries, sliced
1 Persian cucumber, cut in half lengthwise, and sliced into half moons
¼ cup pistachios, coarsely chopped
½ cup quinoa, cooked and cooled (or could use brown rice instead)
Dressing
1 green onion, thinly sliced (green parts only)
2 tablespoons fresh mint, finely minced
2 tablespoons fresh Italian parsley, finely minced
3 tablespoons rice wine vinegar
1 tablespoon canola oil
Pinch of salt and a few grinds of fresh black pepper
1. Place the 1st seven ingredients (lettuce through quinoa) in a large salad bowl.
2. In a small jar, (with a tightly fitting lid) combine the dressing ingredients. Close the lid tightly and shake to combine. Taste and adjust seasoning if needed.
3. Pour desired amount of dressing on the salad (a little goes a long way) and toss.
4. Plate and serve. Or if you’re alone, just grab a fork and dive in!
Enjoy!
Wednesday, May 12, 2010
Bare Bones about Calcium
"Got Milk?" We've all seen and heard the ads and "experts" telling us to increase our dairy intake in order to get enough calcium to keep our bones strong and decrease our risk for osteoporosis. If this is the case, then why does the U.S. have such a high rate of osteoporosis and one of the highest rates of dairy consumption? In fact the only countries with higher rates of osteoporosis have even higher rates of dairy consumption. So what's the deal? What the heck is going on here?
Here's the story, dairy foods are, in fact, high in calcium. However they are also high in animal protein. Several studies have proven that diets higher in animal protein and salt actually causes a leaching of calcium from the bones, and then it is lost in the urine. Unfortunately the rate of calcium loss from the animal protein and sodium is greater than the rate at which the calcium is absorbed. So you end up with a net calcium loss.
Absorption is another issue. The calcium found in plant foods is actually more readily absorbed by the body, without the detrimental effects of animal protein. The following table is taken from Disease Proof Your Child by Joel Fuhrman, M.D.:
100 calories of calcium % amount absorbed
Skim Milk 334 mg 32% 107 mg
Kale 449 mg 59% 265 mg
Bok Choy 787 mg 54% 435 mg
Broccoli 189 mg 53% 100 mg
So another way to state it would be to say, the less sodium and animal protein you consume, the less calcium you need.
I was shocked when I learned about this, and these are actually good studies! So think twice before you load up on the cheese and yogurt to "bone up" on calcium. You may want to consider reaching for some fruits and veggies instead.
Monday, May 10, 2010
Roasted Garlic Aioli and Steamed Artichokes

Spring is artichoke time and around here we're starting to see a lot more of them. If you get the chance, pick one up and try it. Artichokes are low in calories, high in fiber and one of the richest vegetables in minerals including calcium, iron, potassium and magnesium. Artichokes also contain phytochemicals like cynarin that are thought be be good for boosting liver function, and have detoxifying properties as well. Artichokes are also rich in Vitamin C and folate (the naturally occurring form of folic acid). The heart of the artichoke (the reward after eating the "meat" off of all of the leaves) is the most nutritious (and delicious) part of the artichoke.
I've often wondered how the discovery of artichokes as an edible food played out. Did someone try to eat this large thistle on a dare, or were they just REALLY hungry? Hmmm, who knows.
Roasted Garlic Aioli and Steamed Artichokes
Steamed Artichokes
Artichokes can be steamed a day or two in advance if you like. After they are steamed and cooled, store them, covered, in the refrigerator.
1. Place enough water in a small saucepan to submerge about 1/4 of the artichoke(s). Squeeze juice of a lemon in the water, and bring to a boil.
2. While the water is heating, go ahead and prep your 'chokes. Trim the top third off the artichoke and snap off any tough outer leaves. Also cut the stem off at the base of the artichoke. Use a clean scissors to trip the trim the thorns off the remaining outer leaves. At this point, rinse the artichoke well under running water. By now your water on the stove is probably boiling. Carefully add the artichokes and steam for about 20 minutes or until the leaves are easily removed. When done, set on a plate to cool. Artichokes can be eaten as soon as they've cooled, or you can refrigerate and eat them cold (or warm, if you prefer) a day or two later too.
Roasted Garlic Aioli
2 heads garlic
1 T. (or less) extra virgin olive oil
1/3 cup Vegenaise or mayo
Juice of 1/2 a lemon
1-2 T fresh parsley, finely chopped
salt and pepper to taste
1. Preheat your oven to 400 degrees.
2. Remove the papery outside of garlic bulb, but keep the cloves intact with the skins still on. Cut off the very top, so that you expose the tips of some of the cloves and lightly drizzle with olive oil. Place garlic in the center of a piece of aluminium foil and wrap up tight.
3. Roast in the oven for 40-60 min. It will smell fantastic! Once garlic is out, let it cool enough to handle. Squeeze the soft cloves from the skins and mash into a paste.
4. Add Vegenaise (or mayo), lemon juice, parsley, salt and pepper to the roasted garlic and stir to combine.
Adjust to taste. Enjoy!
FYI: Hope you enjoy the pictures of the last two recipes. This is not clipart, folks. These are pics of the actual dishes, prepared and photographed here in our kitchen. So, for those of you who like to know how something is "supposed" to look when it's done, here you go. Of course you're encouraged to be creative too! I'll try to include more pics as we go on. Enjoy!
In good health,
Your Nutritionista
Thursday, May 6, 2010
Homemade Hummus recipe has been REVISED!
FYI: The recipe for Homemade Hummus has been revised. I did a little tweaking and liked this version better. Scroll past the quesadilla recipe for the revised hummus. Enjoy!
Monday, May 3, 2010
Hummus "Quesadillas"

Hummus "Quesadillas"
8 tortillas of your choice, as long as they are whole grain (i.e. corn, whole wheat, spelt, or brown rice)
1/4 cup of your favorite salsa (I like the roasted tomatillo salsa from Trader Joe's)
1/2 cup hummus (either store bought or the oil-free homemade version included below)
1 avocado, mashed - I know, it's a lot of avocado. Use less if you prefer.
1. Preheat a large non-stick pan over medium heat
2. Spread a thin layer of hummus on half of the tortillas. Then dot each of the hummus tortillas with about 1 tablespoon of salsa (less if you're using smaller tortillas)
3. Smear about 1/4 of the mashed avocado on each of the remaining 4 tortillas.
4. Place avocado tortillas on top of the hummus tortillas (avocado side down). And cut each tortilla into quarters (4 triangles).
5. Heat the "quesadillas" in the preheated skillet and watch carefully. You may have to adjust the heat. Heat each side until lightly browned.
Basic Homemade, oil-free Hummus (REVISED!)
Can't get much easier than this, folks.
1 can Garbanzo beans, drained and rinsed
1/4 cup tahini (sesame seed butter) If you have a high powered blender, you can use 1/4 cup unhulled sesame seeds instead.
1/3 cup water
Juice of 1 lemon
1/4 teaspoon cumin
1/4 teaspoon salt
1 small clove garlic
pinch of red pepper flakes
Throw it all in the food processor or blender and process until smooth. If the hummus is too thick for your liking, add a little more water to thin it out. Serve with bread, cut veggies, or in the hummus quesadilla!
The Benefits of Beans
Before I get into bean basics, I just want to encourage you to please feel free to leave any comments you may have about the recipes and articles. There was a glitch that was brought to my attention last week, and it has since been resolved. So now you're free to comment away! It's great to get feedback and encourage discussion. It's a great forum asking questions too. Since, chances are, someone else may have the same question, the answer can then be available to other readers too. Other readers may also have info to share too. The comments on cholesterol last week were great and I encourage you to check them out. However they were at a pretty highly detailed level. Don't feel like you have to write anything nearly as involved or intellectual. This is a place for EVERYONE!
Okay now let's talk about beautiful beans, or legumes.
If you don't currently include legumes as part of your regular or daily diet, you may wish to consider doing so once you read about what nutritional superstars they really are! There are so many choices out there too; black, navy, pinto, black, adzuki, or garbanzo beans, various types of lentils, the list goes on and on. Not to mention the fact that they are an easy, filling and inexpensive addition to any meal.
Here is a quick list of the top 5 reasons to include beans in your diet:
1. Bulky Beans - Legumes are naturally high in fiber. 1 cup of beans has 12-15g fiber. That gets you about half way to the daily recommended intake of 25-30g/day. The high fiber content allows you to feel full and satisfied, without consuming a lot of extra calories and fat, and helps regulate insulin and blood sugar levels. The soluable fiber in legumes is the very type of fiber that we spoke of last week that binds with cholesterol in the digestive tract and carries it out of the body. Soluble fiber also slows the rate at which glucose (sugar) travels from the food we eat to the bloodstream, decreasing the need for the body to produce more insulin. High insulin levels can also be a precursor to diabetes. Insoluable fiber (aka roughage), also found in legumes, is helpful with digestive regularity and decreasing one's risk of colorectal cancer. Just a word of advice though...anytime you increase your fiber intake, be sure to also increase your fluid intake along with it, or else you'll be pretty backed up and uncomfortable. So eat your beans and drink your water!
2. About the size of a vitamin, but so much more! - Beans are full of vitamins, minerals and disease/cancer fighting phytochemicals found only in plant foods. Nutrients commonly found in various legumes include iron, calcium, zinc, copper, folate (the form of folic acid found in food), potassium, B vitamins. For example, lentils are high in folate which is particularly important for pregnant or nursing women. I learned this first hand early on in my pregnancy with our first child, Nathan. I found myself craving, not chocolate or ice cream but LENTILS! What?! Just goes to show that our bodies sometimes crave things we actually need.
3. Super Beans - Beans are disease fighters. Studies have shown that regular consumption of beans can reduce one's risk of heart disease, colorectal and other cancers, and diabetes.
4. Power Beans - Beans are packed with healthy plant protein. Animal protein has been linked with a wide variety of health issues, which I promise to get into a more detailed discussion about in a future post. Casein for example, which makes up 80% of dairy protein is actually a known carcinogen (cancer causer). Consuming animal protein can actually cause our bodies to lose calcium too. Seems ironic since we are all told to increase our calcium levels by eating more dairy (But isn't it the dairy board that keeps telling us that with those "Got Milk?" ads?). Yet for some reason, this information is not widely shared with the general public. Studies have shown that when a high plant protein diet was pitted against a high animal protien diet, the health problems associated with the high animal protein diet were siginificantly less, sometimes non-existent, in the plant-protein group. Replacing even some of the animal protein you consume with plant protein will help decrease your risk of disease. I am by no means advocating a high protein diet. Most Americans eat too much protein as is. But it seems to me from the data I've seen, that the type of protein we consume is probably more influential than the actual number of grams. I know this is controversial and I'm sure I'm going to get a few comments on these statements.
5. Easy Beans - Beans are so easy to incorporate into your diet. They are inexpensive, can be purchased dried and soaked overnight at home, or canned and ready to use. Beans are a great way to make a dish more filling and a great source of plant protein.
So there you have it. Some basic general information about the Benefits of Beans. So next time you're in the store, pick up a can or two and try adding them to something, or pick up a container of hummus. Our daughter's favorite snack is hummus (garbanzo bean and sesame seed dip) with pita bread, and our son's favorite meal right now is whole wheat spaghetti with beans and kale. Is it any wonder he was craving legumes in the womb?!
The recipe posted today for Hummus "Quesadillas" rocks! Give it a try. It will become a new favorite go to snack/appetizer/lunch.
In Good Health,
Your Nutritionista
Monday, April 26, 2010
Cholesterol - What's In a Number?
We all hear about cholesterol and how it increases our risk of heart disease. Most everyone either knows someone who is on a cholesterol lowering medication, or is on one themselves. We are left to believe that high cholesterol is just an inevitable thing, or that it is genetic. But the truth is that it doesn't have to be inevitable. Unfortunately we are, to some degree, set up to fail. Even those who want to lower their cholesterol by following the national guidelines are failing. This is due to the fact that these guidelines are not based on the research. If you take a closer look, you'll find that following the current guidelines will not help one achieve their goal. So what will? Keep reading, bear with me, and I'll let you know.
First we need to understand what cholesterol is. Cholesterol is made by all animals and is not essential to obtain in the diet. In fact the body makes cholesterol on it's own. The purpose of cholesterol - it's an essential component of all sex hormones and the membrane that surrounds our cells. Since we don't need more than the body can make, excess consumption actually leads to a build up of cholesterol in our bodies, which later accumulates in our blood vessels. It isn't just cholesterol consumption that increases blood serum cholesterol levels. Eating excess amounts of dietary fat actually increases the body's production of cholesterol as well. This is why a vegetarian who eats oil, dairy, and processed foods like cookies, chips, doughnuts, pastries, etc. can still have a high total cholesterol level.
LDL cholesterol (low density lipoprotein) is nasty stuff. Just remember the first "L" in LDL stands for LETHAL. LDL cholesterol is the stuff that, in excess, creates deposits in the vessels causing a build-up along the walls of the arteries that create a narrowing, and possibly an eventual complete blockage of the artery opening, causing the blood flow to significantly decrease through the vessel.
One would think that the most common cause of a heart attack is the complete blockage of an artery. In fact, more often the case is that a small, fatty piece of plaque ruptures or breaks off from the artery wall and travels through the blood stream to another location where it gets stuck and causes a blockage. This could occur in the brain, a lung or coronary artery. Scary stuff, no?
The current guidelines found on the American Heart Association's website are as follows:
Total cholesterol: Less than 200 mg/dl
LDL: optimal is less than 100mg/dl, 100-129 mg/dl is considered "near optimal"
Now, if you look at medical research, the appropriate numbers seem a lot different than those listed above. For example, it's been known in the medical community for decades that 1 in 4 heart attacks occur in those with a total cholesterol level between 180-210 mg/dl. The Framingham Study is a 50 year (and counting) multi-generational heart study that revealed 1/3 of those with heart disease, participating in the study, had a total cholesterol of 150-200 mg/dl.
The Framingham Heart Study also found among their subjects that NO ONE WITH A HEART ATTACK EVER HAD A TOTAL CHOLESTEROL VALUE UNDER 150mg/dl! That's huge! Another study known simply as "The China Study", and considered to be one of the most comprehensive nutrition studies ever, discovered that residents of rural China (where heart disease is nearly non-existent) had total cholesterol levels that ranged from 90-150 mg/dl.
So, you see, millions of Americans who are doing their best to follow the guidelines to decrease their risk for heart disease are getting sick, despite their best efforts, simply because they don't have accurate, complete information. Argh!! I get so worked up over this!
This is only a sampling of the research that can allow us to come to the following conclusion...
If we REALLY want to avoid heart disease, we need to get our total cholesterol levels below 150 mg/dl, LDL below 80 mg/dl, and decrease our fat intake. The most appropriate and effective way to achieve this goal, with or without cholesterol lowering medication, is to significantly increase our intake of high fiber vegetables, fruits, legume and whole grains and limit our intake of animal products.
So there you have it: the national guidelines and what the research tells us about the reality of avoiding heart disease. If you are interested in learning more about this topic, I highly recommend reading Prevent and Reverse Heart Disease by Dr. Caldwell Esselstyn, Jr., The China Study by T. Colin Campbell, and Dr. Dean Ornish's Program for Reversing Heart Disease.
Now that you have the information, you have the power to make your own educated decision about your cholesterol. If you haven't had it checked recently, ask your doctor for a fasting blood serum cholesterol test. You can also call your local pharmacy about cholesterol testing. Some blood banks also offer to send your blood cholesterol results when you donate a pint of blood too.
A great place to start is to try the recipe posted for Everyday Oatmeal - a great, cholesterol lowering way to start your day!
In good health,
Your Nutritionista
Everyday Oatmeal
This is literally what I make for breakfast at least 3 times per week. The kids devour it and it stays with them throughout the a.m. - unlike when they have boxed cold cereal and are already asking for more food on the way to school. The shredded apple is a little extra touch that I think adds a nice bit of texture and sweetness. The kids definitely eat more of it when I add the apples. Cooking the nuts and dried fruit with the oats also helps to plump up the raisins and soften the nuts.
Oatmeal is full of soluble fiber which actually binds with cholesterol in the digestive track and lets it hitch a ride out of the body, which in turn, can help to decrease serum cholesterol levels.
Cinnamon is also great for anyone dealing with having to control their blood sugar. Studies have found that daily cinnamon may actually help to stabilize blood sugar.
Everyday Oatmeal
original Your Nutritionista recipe
Yields 1 large or 2 small servings
½ cup Old Fashioned Rolled Oats
¼ teaspoon cinnamon
1 cup water
¼ teaspoon vanilla
2 tablespoons raisins or dates
2 tablespoon walnuts or pecans (I just break them into small pieces with my hands).
¼ medium apple, shredded with the large holes of a box grater
Combine all above ingredients and microwave for 1-4 minutes, depending on your microwave.
If you prefer not to nuke your food, you can also cook this on a stovetop. Just boil the water in a small saucepan, then carefully add the remaining ingredients and cook for about 5 minutes or until at desired consistency. Don’t forget to stir occasionally while its cooking on the stovetop!
Tuesday, April 20, 2010
Chocolate Almond Peanut Butter and Banana Smoothie
The following recipe is one of my kids' all-time favorite afternoon snacks.
Chocolate Almond Peanut Butter and Banana Smoothie
Yields 2-3 servings
Ingredients can be found in most grocery stores
Dump the following in a blender. And blend until smooth. Enjoy! Super Yum!
2 Cups chocolate almond milk
2 heaping Tablespoons natural peanut butter (try to avoid anything with ingredients other than peanuts and maybe salt).
1-2 large ripe bananas
The following are optional additions to kick up the nutritional value of your smoothie
- 2T flax seed meal - Flax provides cancer fighting lignans, and omega 3 fatty acids for brain health
- 1 large leaf kale, spine removed - Kale is one of THE most nutrient dense green leafy veggies on the planet! It really boost the nutritional punch of this smoothie and you can hardly taste it, though Kale might make your smoothie a little green, it will taste amazing and your body will thank you for those leafy greens!
- 1/4 avocado - Avocado will increase the calories and fat content of your smoothie. However, avocado is high in healthy fats and is considered to be an anti-cancer food.
Your Nutritionista is here!
Hi!
Wow, my very first blog post EVER! Very exciting. This is where my lifelong passions for cooking, and promoting health converge.
So what on earth made me decide to "pull the trigger" and become a blogger? The desire to help others and provide support and reliable information to those who want to make educated decisions about their own health. The U.S. is in a major health crisis right now and so many of the ills that plague Americans today CAN be prevented with a change in how we look at food, and what we choose to eat. The more I have learned about nutrition and human health over the years as a Health Education professor, Health Coach, Exercise Specialist, and a mother, the more of a believer I have become in the power of healthy eating.
So what IS "healthy eating"? Ahhh, that's a subject for a future post!
So many people want to make a change or have already started. If you are in either of these categories, then good for you! Making the decision to make a lifestyle change and taking the first steps is HUGE! Others desperately need to change but aren't sure if they can or want to. Many are scared to fail or are just so overwhelmed by all of the conflicting information flying around that they don't know where to begin.
Please understand that the more knowledge you have going into it, and the more prepared you feel, the more likely you are to succeed! And even if you have made attempts in the past and have failed always remember this...
The harder you try, the smarter you get! Regardless of the outcome. If you don't give it much effort, it probably won't be as rewarding of an experience.
I know this from personal experience. It was just over one year ago that I began digging into learning more about plant-based nutrition and the effects of various foods on the way the body works. When I started looking into it, I was cynical, and more than a little leary, but remained open minded. The research evidence was compelling and sound enough to convince me and my family to make changes to our diet and change some of our cooking and eating habits. As a parents, we weren't just concerned with our own future health, but that of our children as well. Helping them to learn about the importance of healthy eating was a skill we wanted them to learn now and take with them throughout their lives.
I can't wait to share this with you!
Of course we can't forget the cooking component. Heck no! That's the fun part! I'll try to include a new recipe with each post. They will be original, kid tested "Your Nutritionista" recipes.
It has been a remarkable journey with a substantial learning curve. I can't wait to share these findings and experiences, tips and, of course, recipes with you. If my husband and I can make healthy eating work for us, and bring our two young children on board, then anyone can do it!
In good health,
Your Nutritionista
Subscribe to:
Posts (Atom)