Hi Everyone! Thank you so much to those of you who took the time to vote and provided some really original ideas. The winner, with over 40% of the vote was "Mel's Healthy Kitchen". So, from now on, in order to check new postings please go to http://www.melshealthykitchen.com/. I am so sorry for any inconvenience, but it is my intention to not have to go through this again!
When you visit the new blog, you will also see a new recipe, for a really terrific smoothie that the kids and I came up with on July 4th. Add a little rum and it would be a knockout adult treat too! Thank you so much for your support. I look forward to keeping you "posted" on the latest and greatest and hearing your comments.
Please share the new website with anyone else you think may be interested.
In Good Health,
Mel
(formerly Your Nutritionista)
Tuesday, July 13, 2010
Wednesday, July 7, 2010
Chocolate Cake with Minty Chocolate Frosting!

Have fun! I encourage you to try them on one of your favorite recipes, or one that you've been thinking about trying. Of course you can always just make this one and be blown away by just how good "healthier" can taste!
Chocolate Cake with Chocolate Mint Frosting
(adapted from tryveg.com’s free vegetarian starter guide)
CAKE:
2 ¼ cups whole wheat pastry flour
4 ½ Tablespoons cocoa powder
1 ½ cups raw sugar (or evaporated cane juice)
1 ½ teaspoons baking soda
½ cup unsweetened applesauce
1 ½ Tablespoons white vinegar
1 ½ teaspoons vanilla extract
1 ½ cups cold water
1. Preheat oven to 350 degrees, spray a 9x13 inch pan with cooking spray.
2. Combine dry ingredients in a large mixing bowl and mix with a wire whisk
3. Add wet ingredients to the dry and stir quickly, until batter is smooth.
4. Pour smooth batter into the prepared pan. Bake for 20-30 min. (or until you can insert a toothpick and it comes out clean). Cool completely before icing. Easy Peasy!
ICING:
1 12-oz. bag of dairy-free chocolate chips
¼ cup milk substitute (rice milk, or soy milk)
1 Tablespoon (yes, Tablespoon) of peppermint extract
1. Melt chocolate chips in a small saucepan over very low heat. Add milk substitute and peppermint extract and stir continuously. Add a little more rice milk or peppermint if necessary to reach desired flavor and consistency.
2. Cool completely before frosting the cake. This cake is wonderful on it's own, but if you want to make it a little more decadent, add a small scoop of non-dairy "ice cream" (ex: Soy Delicious Ice Cream, or Coconut Bliss). Enjoy!
Tuesday, July 6, 2010
Rock the Vote!
Thank you all for all of your contibutitions and creative ideas. I know I said I'd narrow it down to 3-5, but I could only whittle it down to 6. This is where your input, again, is much appreciated. Please try to keep your votes to only your top 1 or 2 favorites. Your input will weigh very heavily on the final decision.
Thanks again for your help. Polls will close in 1 week. :)
Watch for a new recipe in the next day or two! This one's for you, chocolate lovers!
Thanks again for your help. Polls will close in 1 week. :)
Watch for a new recipe in the next day or two! This one's for you, chocolate lovers!
Saturday, July 3, 2010
Help! Our Blog is Having an Identity Crisis!
It seems as though there are quite a few "nutritionistas" out there. So many, in fact, that it is hard to get a URL (website address) and the search results are numerous. So it looks like we're going to have to start looking at changing the name of our little blog before it gets much bigger.
I've always been one for brainstorming, so your suggestions are critical. If you have any clever, unique ideas, please email them to me at meltrinidad@gmail.com. The top 3 to 5 results will be posted for blog readers to vote on.
Thank you so much for your continued support and creative input!
Next week look for a new post with a recipe for Chocolate Cake with Chocolate Mint Frosting! Yummy!
Thursday, July 1, 2010
Baking Substitutions for Healthier Treats!

The 2 reasons why I now bake.
A Declaration of Baking Independence!
For years I've said "I don't bake, I cook." However, I am now finally starting to admit to myself that, yes, I do in fact bake...and it's fun!
The perceived constraint of not being able to deviate from a recipe seemed too restrictive. I like having the flexibility to play around with amounts and ingredients, which cooking lends itself to very well. My guess is that many of you can relate.
Now, as I begin venturing out of my "comfort zone" with regard to baking, I'm starting to learn that yes, one can make substitutions to create delicious and nutritious baked goods. You just have to be careful of what you change, and just how much.
Below you will find several substitutions that I have learned from a wide variety of sources, and through trial and error (Better my errors than yours, right?!). Now you can have a treat without the added fat and calories of oil. You won't miss the cholesterol and saturated fat from butter and eggs. Use whole grain flour in place of all-purpose white flour for added fiber and nutrients our bodies need to function properly.
This is where YOUR comments are so vital. I know there are many of you out there who have a favorite healthier subsititute that you like to use. By all means, please share it!
SUBSTITUTIONS
WHITE ALL-PURPOSE FLOUR
Whole wheat pastry flour (for items leavened with baking powder or baking soda, not yeast)
White whole wheat flour (good for yeast breads)
The following flours are also fun to use too.
Garbanzo Flour (aka Gram flour) – Gluten free, high in protein and fiber. Used in Indian and middle eastern food. Great for flatbreads and thickening soups and sauces.
Spelt flour – an ancient cousin to modern wheat, spelt has a nutty flavor and is high in fiber. Great for breads and baking.
Barley flour – easily digested, wheat-free, low gluten content.
BUTTER
Non-hydrogenated, trans-fat free margarine Earth Balance is now available in sticks for baking too!
OIL
Applesauce
Mashed ripe bananas
Prune puree – Baby food prunes work great!
EGGS
Flaxseed meal (2 Tablespoons + 1/4 cup water per egg)
Egg Replacer (1 Tablespoon + 3 Tablespoons water per egg) I use Bob’s Red Mill brand
CREAM
Cashew cream - Soak raw cashews overnight in water, drain and cover with fresh water and blend on high power until smooth.
MILK
Any of the following "milks" will do a good job at replacing cow's milk:
soy, almond, hemp, rice, hazelnut, or oat milk
GRANULATED WHITE SUGAR
Pure Maple Syrup
Agave Nectar
Brown rice syrup
Raw cane sugar (aka Turbinado sugar)
Organic sugar (aka Evaporated cane juice)
NOTE: if you use a sugar product, make sure that it says it comes from cane sugar. Otherwise it may come from a genetically engineered source. Sugar beets are now commonly grown from genetically engineered seed.
So get bakin' in the kitchen and try one or more of these substitutions, and share your creations! You'll feel less guilt, your body will thank you, and the smiles you generate will make your efforts worth while!
Have a Happy 4th!
In good health,
Your Nutritionista
Thursday, June 24, 2010
The Quick and Easy Green Panini

In the spirit of Food Network celeb, Guy Fieri… “One bite of this sammy and you’ll be takin’ the train to flavor town!”
Okay, if you can make a grilled cheese sandwich, you can make a Panini! And, you don’t need some fancy-pants Panini grill to do it. Although if you have one, they are nice and make those very pretty grill marks on the bread.
Me, I’m cheap, and I’m old school. Though I must admit I have been known to be a sucker for kitchen gadgets, for my Paninis I just use a cast iron griddle (smooth) or grill pan (creates the traditional grill marks) and something heavy to smoosh the sammy (wrap a brick in foil and you’re good to go)! My Lodge griddle came with a “bacon press” so I just use that. The bacon press is just a cast iron plate with a handle.
Thank goodness for food ruts, since that’s how I come up with some of my favorite recipes and this one is no exception. Last week I was in a total lunch rut, and wanted to do something easy but different, so I thought….panini! This is what I came up with and the results were incredible. The flavor in this thing (largely due to the fresh basil leaves) lingers and makes you want to savor the flavor before taking another bite. The biggest bonus…the whole family loved them, in fact, they inhaled them! AND they were full of greens and wonderful healthy veggies. BO-NUS!!!!!!
You’ll notice that I do use a little trans-fat free non-dairy margarine on the outside of the Panini’s to create a more browned and crispy exterior. However, you can just as easily skip this part and not add the extra fat, especially if you are using a non-stick cooking surface.
Like in the hummus quesadillas, the hummus here becomes oozy and may start to drip a little over the sides of your Panini. Be careful not to pile the fillings too high though. Paninis are supposed to be thin, and if you add too much stuff, it will all ooze out onto your pan. So don’t go too crazy, just keep it simple.
Again, this is another recipe that I encourage you to play around with. If you aren’t crazy about basil, try a different fresh herb that you DO like, or add fresh spinach. Make it your own, and make it healthy!
Panini Verde
Makes 4 Paninis
¼ cup water
4-6 oz. sliced mushrooms
½-1 Tablespoon tamari (can use soy sauce or Bragg’s Liquid Amino Acids instead)
2-4 cups kale, chopped
Earth Balance, or other trans-fat free, non-dairy margarine
8 slices sprouted grain bread (has nuttier texture and nutritionally superior to whole wheat or white bread)
Hummus (see hummus quesadilla post for homemade, oil-free hummus recipe)
1 medium to large tomato, sliced
2 Tablespoons chives, chopped (try using a clean scissors, instead of a knife)
8 large fresh basil leaves
1. Place ¼ cup water in a medium-sized pan, over medium heat
2. Add mushrooms and cook, stirring occasionally, 2-3 minutes. Stir in tamari. Add kale and cook, stirring occasionally, until wilted. Turn off heat and set aside.
3. Heat a large grill pan or griddle over medium heat.
4. Spread a very thin layer of Earth Balance on one side of the bread slices.
5. Flip bread over and spread with a thick layer of hummus.
6. On 4 of the slices, top hummus with the mushroom mixture, tomato slices, chives and basil.
7. Place the remaining halves on top of the mushroom topped ones. The Earth Balance should be on the outside of the sandwiches.
8. Place 2 sandwiches (or however many will fit, without crowding) on the griddle and top with a heavy pan, brick, bacon press, whatever. Once the bottom of the sammy is brown, turn over to brown the other side and press again.
9. Once both sides are browned, remove from the pan, and cook the remaining sandwiches. Once they are done, cut on the diagonal and serve. Yum-a-licious!!!
Friday, June 18, 2010
Eat Them Greens! Green Wrap - 2 ways

Many people say "I can't fit enough veggies into my diet." I completely understand. It was difficult for me too, until I started cutting back on dairy and meat. Then it became much easier. Doing this kind of trade off will also decrease your intake of cholesterol and saturated fat, while significantly increasing your intake of the nutrients your body needs to run optimally. Think of it as fueling your tank with ultra-premium fuel, instead of regular.
One really easy way to bump up your intake of greens is to wrap your meal in a beautiful, huge collard green leaf. They can be the size of a large burrito-size tortilla; perfect for wrapping up lunch as an easy, meal-on-the-go!
The great thing is that these collard wraps are so versatile! You can fill your wrap with just about anything from salads or roasted veggies to left over stir-fry or take-out Thai food. I always try to cook up a large batch of brown rice to have on hand during the week. It really makes quick meals super-easy! Its a great whole-grain, gluten-free filler. Have fun! You're only limited by your own imagination!
Recipes for Green Wraps - here are a couple different variations
One bunch collards, rinsed, stems removed
Blanch whole collard leaves in a large pot of boiling water for 2 minutes, then run under cool water, or place in a bowl with cold water to stop the cooking process. This makes the leaves a beautiful bright green, and more pliable for burrito wrapping.
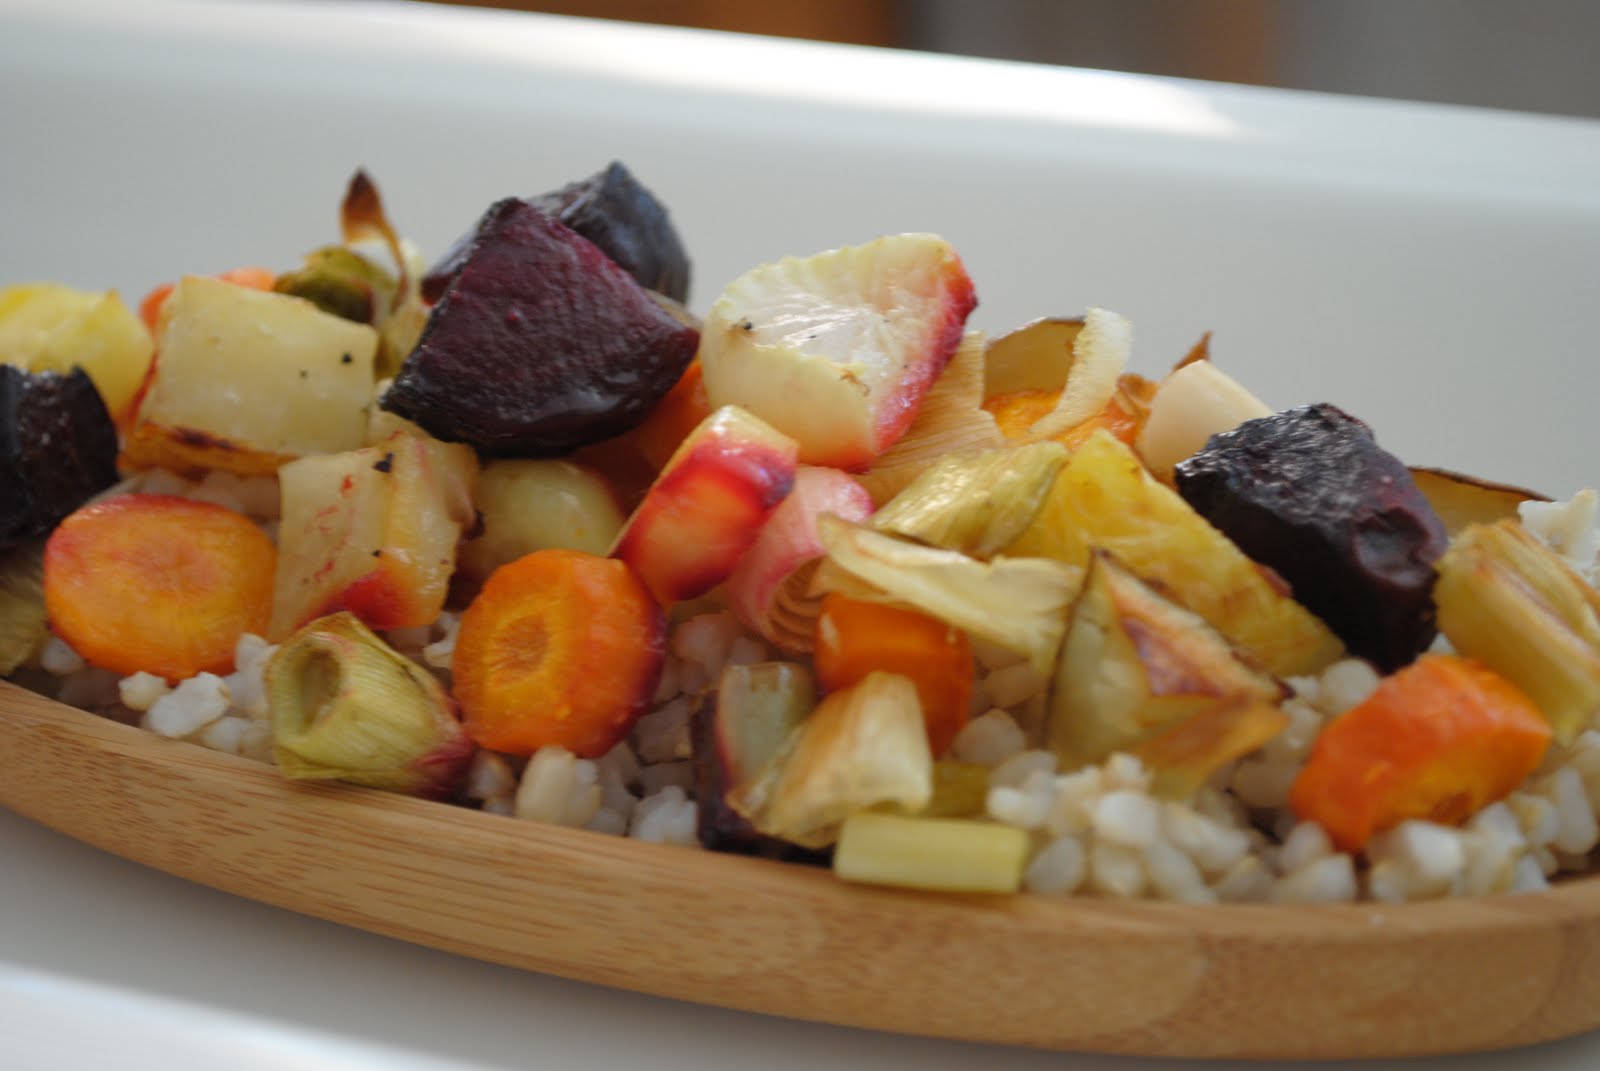
1 bunch beets, tops removed
1 large russet potato
2 carrots
2 leeks cut in half lengthwise, then sliced crosswise and rinsed in a colander OR 1 large onion
1-2 Tablespoons olive oil
salt and pepper to taste
2 cups brown rice, uncooked, rinsed
4 cups water
Preheat oven to 400 degrees. Rinse and scrub veggies, then cut into 1 to 2 inch pieces (the smaller they are, the quicker they'll cook). Throw all the veggies in a bowl, season with salt and pepper and a drizzle of olive oil. Toss to combine. Spread out out over a foil-lined baking sheet (makes for much easier clean up), and roast for 30-45 minutes or until browned and cooked through.
While the veggies are roasting, bring 4 cups of water and 2 cups of brown rice to a boil in medium saucepan, then simmer on low for 40-45 minutes. Easy Peasy!
Once cooled, place some roasted veggies and rice in the center of the blanched collard leaf and wrap it up, burrito style. Fold the sides in first, then roll it up! Roasted veggies and rice make great leftovers too!
Tropical coconut rice and veggie wraps
1/2 small Napa cabbage (Romaine or Boston/Bibb lettuce would work too), thinly sliced
2 large handfuls sugar snap peas
1 large handful bean sprouts
2 teaspoons sesame seeds, to taste
1-2 inch piece of fresh ginger (depending on how much you like ginger), minced (peel the skin off with the edge of a spoon!)
2 green onions (aka scallions), sliced
2 tablespoons rice wine vinegar
salt and pepper to taste
2 cups white rice, rinsed
1 can light coconut milk
Combine napa cabbage through green onions in a large bowl. Drizzle with rice wine vinegar, and salt and pepper to taste. Combine rice and coconut milk either in a rice cooker or small saucepan. Be sure to give the can of coconut milk a good shake before opening, since it may separate a bit in the can. If cooking in a saucepan, bring the coconut milk and rice to a boil, then simmer, covered for 20 minutes.
Lay collard leaf out on a flat surface. Place some of the snow pea salad and rice in the center of the blanched collard leaf, and wrap it up, burrito style. Fold sides in first, then roll it up! Enjoy!!
Subscribe to:
Comments (Atom)